Showing posts with label models own. Show all posts

Wednesday, November 5, 2014

BONFIRE NIGHT NAILS

 photo fireworks-nails-2_zps4e6b3b6c.jpg

I've been a bit wary of bonfire night ever since a rogue firework burnt its way through the audience when I was younger. The booming explosions echoing through the skies and the thick smog that's left behind means that I always approach fireworks night with an air of caution. This year, behind the safety of our balcony, we plan to watch the glittering skies whilst eating foil wrapped baked potatoes loaded with butter, salt and cracked black pepper.

I've painted my nails in honour of the occasion with Maxfactor Prussian Blue and glittered tips for the fireworks. For the tips I chose five of my favourite glitter nail polishes - On my index finger is Models Own Southern Lights which is a stunning lilac holographic glitter, on my middle finger Barry M Magenta Glitter, my ring finger Barry M Blue Glitter and Nails inc Electric Avenue on my little finger. I painted the glitters onto the tips of my nails before sealing them with Sally Hansen Insta Dri. I really love this effect and feel like its perfect for fireworks night!

What are your plans this bonfire night?

Sunday, June 15, 2014

BLUE OMBRÉ GLITTER NAILS

Nail art
blue-ombre-nails
ombre-nail-tutorial

I fell in love with Ingrid's Blue Ombré Glitter mani and so I thought I would try and recreate it. It's perfect for summer and looks so pretty on the nails!

To start my ombre nails I used Liz Earle's strengthening nail colour in 'Rhapsody In Blue'* on my thumb, it's the perfect midnight dark blue colour to start the ombré mani. For the glitter I applied models own Jack frost nail polish over the top.
I used Essie Aruba blue on my index finger as a base and pressed on Nail rock glitter dust in blue whilst the Essie polish was still wet. 
For my middle finger I mixed some of Barry M's blue glitter with the Nail rock glitter dust to create an in-between shade, I mixed them together in a plastic pot until I was happy with the colour and then applied it to my nail.
On my ring finger I applied Barry M's blue glitter and on my little finger Barry M's textured nail effect in 'Lady' which is a lovely white pearl with peach glitter running through it.

To complete the look, I used a top coat to seal the glitter in and to give my nails a finished look. Overall I'm so happy with this nail look and will be wearing it all throughout summer!

xx

Sunday, October 28, 2012

Halloween Black Cat nails

halloween-nails
halloween-nail-art
black-nail-designs
nails

I love this simple black cat nail design, It's easy to do and looks cute on the nails! For Halloween I'll be wearing black sparkly nail varnish on my nails and then have this little cat design as an accent nail!

This is how I achieved the look:

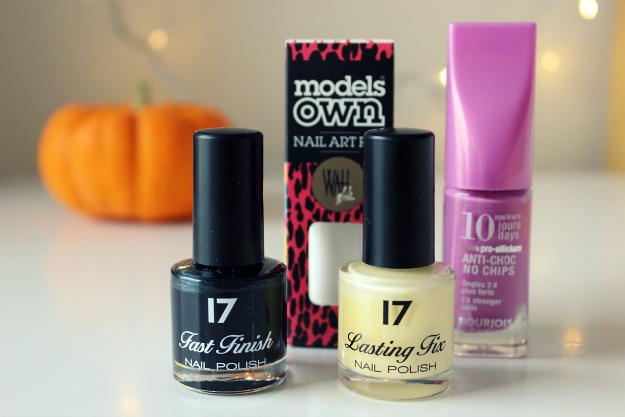
Step 1 -  Paint the whole nail black and wait to dry, I used 3 coats of 17 Nail Varnish in Nightshade.

Step 2 -  Using a cuticle stick, paint a pink triangle on the nail using the middle as a
             guide for the top of the Triangle, but make sure you leave enough room for the  
             eyes! For this I used Bourjois 26.

Step 3 - Again using a cuticle stick draw on the eyes, to do this I made a circle shape and 
            then dragged the stick up to create a 'cat eye' effect. I used 17 Nail Varnish in  
            Sherbet Lemon

Step 4 - Whiskers! I used the thin metal pen end of the models own nail art pen. This has a brush and a pen, I found the brush too difficult to use but the pen was so easy to draw on the nail.

Step 5 - Once the eyes are dry, use a cuticle stick to draw on the pupils. I used 17 Nail Varnish in Nightshade but a Green Nail varnish would also work really well!

Let me know if you try these!