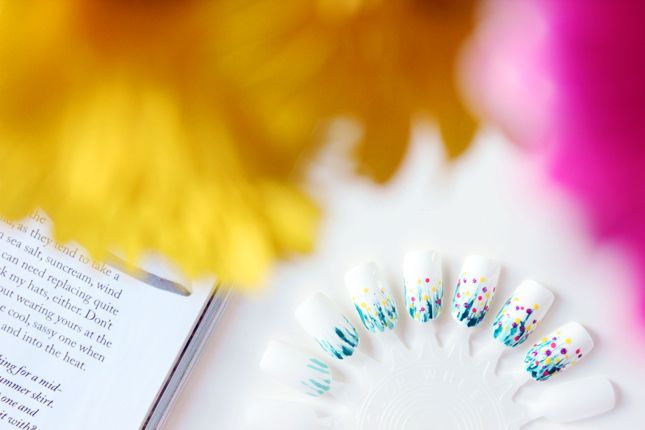
I like to keep any nail art that I create quite simple and easy so that it looks pretty with minimal effort. I've been loving wearing this wildflower design on my nails for summer - it adds a pretty touch to white painted nails and i've had so many compliments whilst wearing it!
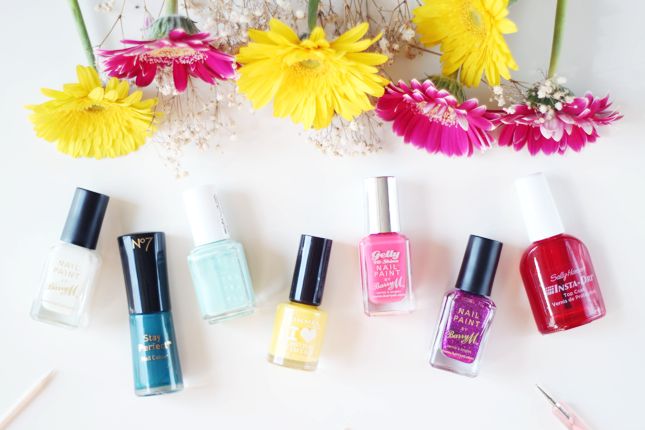
Paint the whole nail with a white nail polish - I used Barry M Matt White.
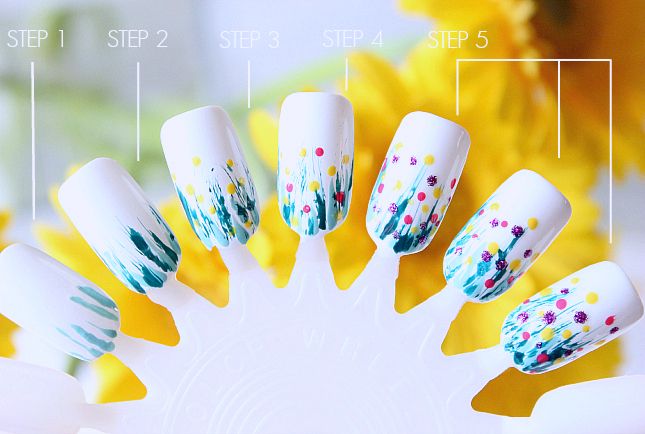
For the design:
Step 1 - For the grass/reeds effect I used Essie Mint Candy Apple. I wiped as much of the product off the brush as I could by wiping the brush on edges of the bottle and then just flicked up the nail.
Step 2 -I repeated this process with a darker green - No7 Totally Teal. This brush was easier to remove most of the product and gave a really good wispy grass effect so I applied this over and around the first grass colour.
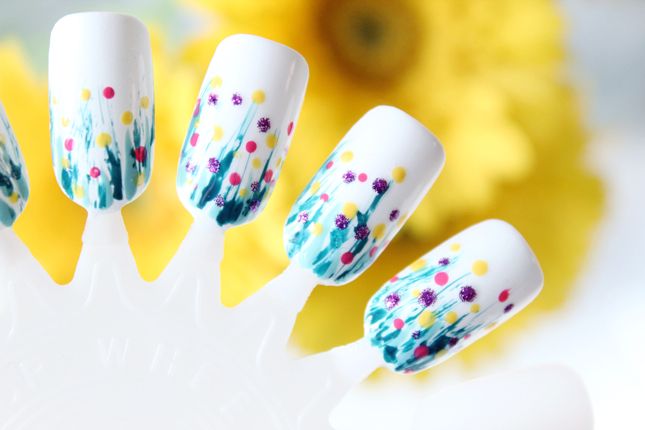
Step 3 - Adding your wildflowers! I chose to use Rimmel sunshine as my main colour to make the flowers really stand out. I dotted roughly 10 flowers on each nail working from top to bottom to give that pretty wildflower look.
Step 4 - I then added pink flowers using Barry M Gelly nail paint in Grapefruit. I added less of these (around 7) and used a smaller dotting tool again to give it a sparse, wildflower effect.
Step 5 - You could skip this step and go straight on to the topcoat, or choose another flower colour but I thought a fuchsia glitter would look really pretty and brighten up the nails. I dotted Barry M Magenta glitter all around the grass/reeds to finish the design.
I then added Sally Hansen Insta dri topcoat to finish the nails.
(I used these nail dotting tools from amazon, they are a great set for only 85p!).
(I used these nail dotting tools from amazon, they are a great set for only 85p!).
Tweet me a pic if you try this! - @sophiesmakeup
No comments:
Post a Comment